Capture Hub
Manage 360°/photo/point-cloud captures, floorplans, and the capture processing queue.
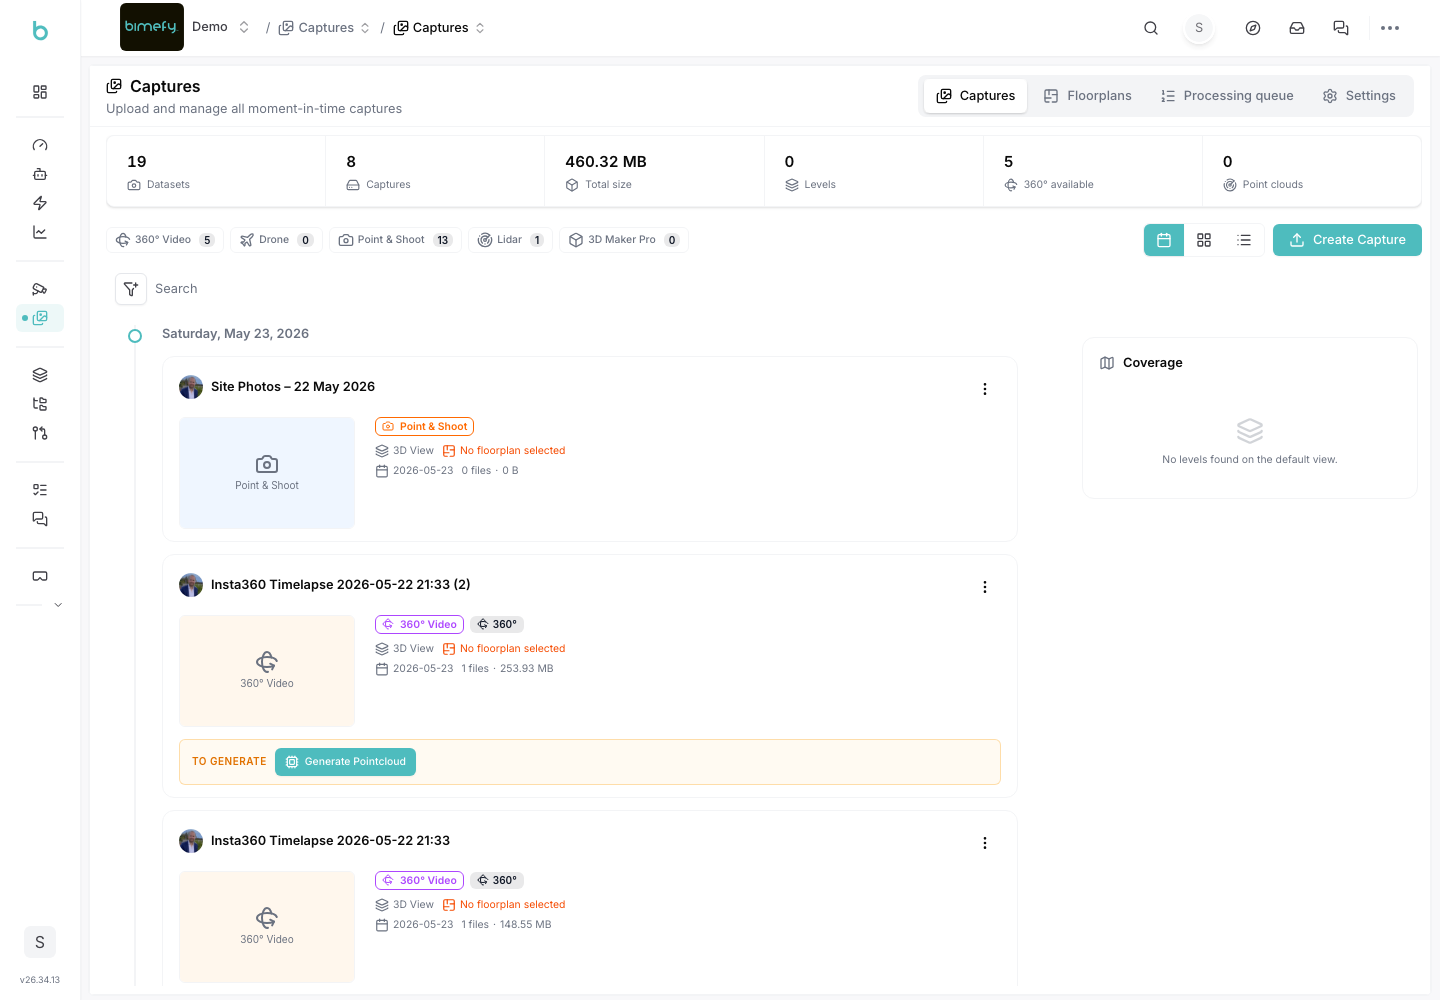
Using the Capture Hub
The Capture Hub is where you manage the reality-capture data collected for your project: 360° photos, point clouds, and the floorplans they're tied to. It sits under Reality Capture in the left-side menu, alongside Live Operations. Captures managed here feed directly into 3D Views and Progress Tracking — and once a point cloud is calibrated, it's also where you launch the BIM vs Reality split-screen comparison.
1. Accessing the Capture Hub
1. Navigate to Capture Hub:
- In the left-side menu, under Reality Capture, click Capture Hub.
2. Captures Tab
- Browse all captured data (360° photos, point clouds) collected for the project.
3. Floorplan Tab
- View captures organized by building level/floorplan.
- Drill into a specific level to see the captures recorded there.
4. Processing Queue Tab
- Track the status of captures that are still being processed (e.g., point-cloud stitching), so you know when new data will be ready to view.
5. Settings Tab
- Configure capture-related settings for the project.
6. Best Practices
- Capture Consistently: recapture the same locations on a regular cadence so progress comparisons stay meaningful.
- Check the Processing Queue: before assuming a capture is missing, check whether it's still processing.
- Organize by Floorplan: use the Floorplan tab to keep captures aligned to the right building level, especially on multi-story projects.